


How to Install Ring Doorbell?
Smart doorbells have rapidly become one of the most popular home upgrades, and for good reason. They allow you to see who’s at your door, speak to visitors, monitor packages, and add a layer of security to your home. Among the top choices in the market is the Ring Doorbell, and if you’re planning to install one in 2024, this comprehensive guide will walk you through the process — whether you’re using a wired or battery-powered model.
We’ll cover everything from unpacking the device to setting up your app, connecting Wi-Fi, and mounting it correctly — plus answer some common questions at the end.
Why Ring Doorbell is a Smart Choice
In 2024, homeowners are choosing Ring not only for its sleek design but also for its ease of integration and reliable performance. Ring doorbells are compatible with a wide range of smart devices, and offer real-time alerts, crystal-clear video, and cloud-based recording.
Ring models such as the Ring Video Doorbell 2nd Gen, Ring Battery Doorbell Plus, and Ring Pro 2 cater to different needs and budgets. With motion alerts and live feeds viewable from anywhere, these devices are designed for both convenience and security. And thanks to ongoing firmware updates, users can expect better stability and new features with time.
What You’ll Need Before Installation
Before beginning the installation process, it’s important to have the right tools and materials ready. Fortunately, Ring provides almost everything you’ll need in the box.
Items usually included in the Ring package:
- Ring doorbell unit
- Mounting bracket
- Mini level tool
- Installation screws and anchors
- Screwdriver and drill bit
- USB charging cable (for battery models)
- Security screws and screwdriver bit
- Quick start guide
Additional tools you may need:
- Power drill (especially for masonry surfaces)
- Ladder (if mounting the doorbell above arm’s height)
- Smartphone or tablet with Ring app installed
- Wi-Fi credentials (network name and password)
- Voltage tester (for wired installation)
Make sure your phone is fully charged before starting, as you’ll use it during most of the installation and setup process.
Step 1: Download and Set Up the Ring App
The Ring App is the control center for your doorbell. It handles everything from device setup to motion detection settings, video storage, and integration with Alexa.
- Download the Ring app from Google Play or the Apple App Store.
- Create a Ring account or log in if you already have one.
- Tap “Set Up a Device” and choose “Doorbells.”
- Use your phone to scan the QR code located on the back of your doorbell or on the packaging.
- Follow the on-screen instructions to give your device a name and assign it to your home location.
This initial setup ensures your doorbell is ready to connect to Wi-Fi and begin functioning properly. Be sure to complete this indoors before heading out to install the hardware.
Step 2: Charge the Battery (If You Have a Battery Model)
If you’re using a battery-powered Ring doorbell, it needs to be fully charged before installation. Ring’s quick-release batteries charge via USB and typically take about 5–8 hours for a full charge.
- Plug the USB cable into the battery.
- When the green LED turns solid, charging is complete.
- Slide the battery into the bottom of your doorbell until it clicks.
A fully charged Ring battery can last anywhere from 6 to 12 months, depending on how often it records and sends alerts. Cold weather and high-traffic areas can reduce battery life, so it’s smart to monitor the battery level through the app.
Step 3: Connect Your Ring Doorbell to Wi-Fi
Once the battery is inserted (or once the device is powered on in a wired unit), the LED ring will light up, indicating it’s ready for setup.
- On the Ring app, proceed with the in-app instructions to connect to Wi-Fi.
- Choose your home Wi-Fi network and enter the password.
- Wait for the device to connect — this might take up to 2 minutes.
Most Ring doorbells operate on a 2.4GHz Wi-Fi band, though some newer models also support 5GHz. Ensure the signal strength is strong by checking under “Device Health” in the app.
Poor signal? Consider installing a Wi-Fi extender like the Ring Chime Pro to strengthen coverage.
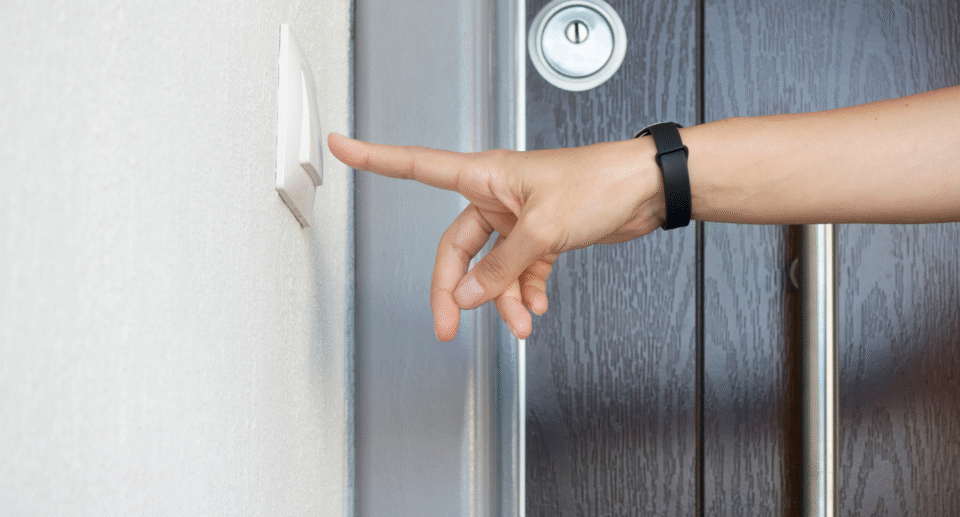
Step 4: Select the Right Mounting Spot
Mounting height and angle play a critical role in how well your Ring doorbell captures footage and detects motion.
Ideal mounting location:
- 48 inches (4 feet) above the ground.
- Flat surface facing the area you want to monitor (entryway, porch, etc.).
- Sheltered from direct sunlight and rain if possible.
If your front door faces a side wall or has stairs, you may need a wedge kit or corner mount to adjust the angle and improve visibility. These accessories help capture the right field of view without false alerts from street traffic.
Tips for Maintenance and Best Performance
Installing a battery-powered Ring doorbell is a straightforward process that doesn’t require any electrical work. Start by holding the mounting bracket against the wall and marking the screw holes. Use a drill to create pilot holes, and if you’re installing on surfaces like brick, stucco, or concrete, insert the provided wall anchors for added support.
Next, secure the bracket to the wall using the included screws. Once the bracket is firmly in place, attach the Ring doorbell to it and tighten the security screw at the bottom to lock it in. The entire process typically takes 10 to 15 minutes and is easy to reverse, making it ideal for renters or those who may want to move the unit later.
Step 5: Installation for Hardwired Models
If your home already has a wired doorbell and transformer, you can upgrade to a hardwired Ring model for uninterrupted power.
- Turn off power at the breaker box.
- Remove the old doorbell and identify the two wires.
- Use a voltage tester to confirm the power is off.
- Attach the two wires to the terminals on the back of the Ring doorbell.
- Mount the bracket, then attach the doorbell.
- Restore power and wait for the unit to power up.
Wired models not only get continuous power, but some (like the Ring Pro 2) support advanced features like pre-roll video and higher resolution streaming.
Step 6: Finalize the Setup in the App
Now that your Ring doorbell is physically installed and powered, it’s time to fine-tune its settings:
- Test Live View: Make sure the video feed is working.
- Configure motion zones: Draw specific areas in the app that you want to monitor.
- Adjust motion sensitivity: If you get too many notifications, dial the sensitivity down.
- Enable Smart Alerts: Let the app distinguish between people, cars, and animals.
You can also enable notifications, integrate with Alexa, and set privacy zones to avoid filming public streets or neighboring properties.
Step 7: Optional – Subscribe to Ring Protect Plan
While Ring provides free real-time video and alerts, subscribing to a Ring Protect Plan gives you access to more robust features like:
- Video recording and playback
- Snapshot capture
- Person detection
- Extended cloud storage (up to 180 days)
Ring Protect Basic is ideal for single-device households, while Protect Plus covers unlimited devices at one address. Subscription plans start as low as $4.99/month.
Even though this step is optional, many users find value in being able to review past events, especially when dealing with package theft or verifying visitors.
Tips for Maintenance and Best Performance
Maintaining your Ring doorbell ensures it works efficiently and captures clear, reliable footage. One of the easiest things you can do is regularly wipe the camera lens with a microfiber cloth. A clean lens prevents blurry or distorted video and helps you identify visitors more easily.
If you have a battery-powered model, recharge the battery as soon as you receive a low-battery alert from the Ring app. Avoid letting the battery fully drain, as this could lead to missed recordings or temporary offline status. It’s also a good idea to review motion events weekly to fine-tune your motion detection settings and reduce unnecessary alerts.
For those living in areas with harsh weather, protecting your Ring doorbell from extreme elements is key. Use a cover or mount it in a shaded area to shield it from rain, snow, or intense sun. Lastly, ensure your firmware stays updated — the Ring app handles this automatically as long as the device remains online.
Troubleshooting Common Problems
Even the best devices can experience hiccups. Here’s how to solve common Ring issues:
| Problem | Likely Cause | Solution |
| No video or delayed feed | Weak Wi-Fi signal | Move router closer or use extender |
| Too many motion alerts | Motion zone is too wide | Redraw zones in the app |
| Battery draining quickly | High activity levels | Reduce sensitivity or enable “People Only” mode |
| No sound during video calls | Microphone disabled in app | Enable mic access and two-way audio |
Most issues can be resolved directly within the app under Device Health or Settings. In rare cases, a factory reset may be necessary, which involves holding the setup button for 15 seconds.
Conclusion
Installing a Ring Doorbell in 2024 is simpler and more accessible than ever. Whether you’re mounting a battery-powered version on your apartment door or hardwiring a Pro model into your home, the setup process is designed for everyday users — not just tech experts.
By following this guide, you’ll enjoy not only the added convenience of a smart doorbell but also the peace of mind that comes with real-time video monitoring and secure access control. It’s a modern upgrade that pays off every time the doorbell rings.